

What is Shopify?
How does Shopify work?
How do I get a store up and running so I can start making money?
If these questions and more are swimming around in your mind, you’re in the right place.
In this complete step by step Shopify tutorial, we’ll show you how to set up your very own store.
We’ll take you through everything you need to know from signing up to making that crucial first sale.
Sound good?
Let’s get into it.
Create your Shopify account.
First things first. You need to create an account with Shopify.
Signing up with Shopify is quick and easy.
Go to Shopify.com.
Hit one of the 2 handy big blue buttons that say “start free trial”.
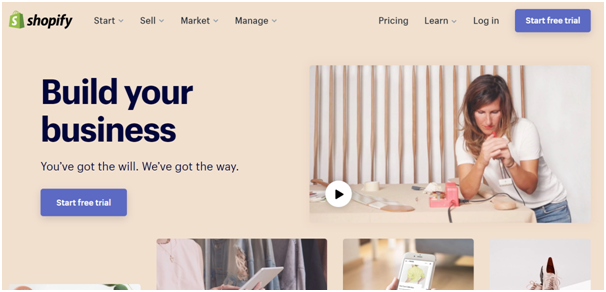
The free trial period is 14 days. After that, you’ll need to start paying.
Once you press the blue button, you’ll see the following sign up screen:

Pop in your details. You’ll need to enter your email address, create a password and input your store name.
Your store name needs to be unique or you’ll be asked to enter another name.
Don’t worry too much about creating the perfect store name at this point as it is only used to create a myshopify.com domain.
You will almost certainly want to change this at a later stage once you have bought a domain name from a third party.
Once you hit the green start free trial button you’ll see a screen called “tell us a little about yourself”:

Don’t worry too much about what to put here. It only affects the emails you’ll get from Shopify.
If you’re just dipping your toe in at this point, there are options like “I’m just playing around” in the top drop-down menu and “I’m not sure” in the bottom one.
Follow the prompts and enter your personal details including your name, address (you can use your home address or a business address if you have one) and telephone number:

Once you’re done, hit “enter my store”.
Pick a theme.
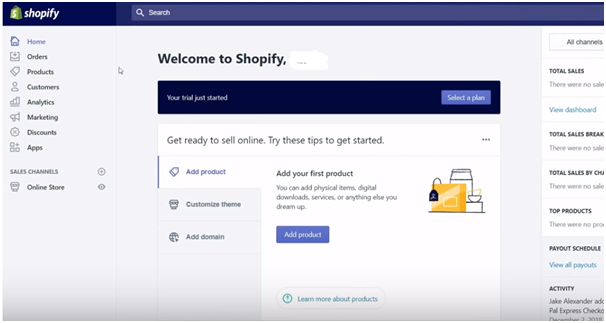
This is the point at which you will be taken to what’s known as the “back end” of Shopify.
The “back end” is your main control panel, your command centre if you will.
From here you can do pretty much everything including customising your store, uploading products and setting up payments and shipping.
It’s a good idea to spend a few minutes familiarising yourself with your new command center.
Here’s what it looks like:
To choose a theme, first, click “online store” on the bottom left, then scroll down the themes page that appears and select either the “Explore Free Themes” or the “Visit Theme Store” options on the bottom right:

In the theme store, you’ll find a wide selection of themes (both free and paid) to suit every business.
You can filter by Industry, Style, Layout or Feel. To save you some time, here’s a list (in no particular order) of the top 10 free Shopify themes:
You could also purchase a custom theme from a third party website such as Themeforest. They have thousands of themes starting from $2.
However, be aware that you will need to upload it separately (though this is fairly straightforward).
For each theme in the store, you’ll see a big blue button that gives you the option to demo the theme, so have fun testing out a few to see what works for you.
Each theme page will also tell you the main features of the theme which will give you an idea of what type of website or business it’s suitable for.
You should also scroll down to the bottom of each theme page to check out the reviews, as these will highlight any potential problems.
Once you have settled on a theme, go ahead and add it to your store via the “add theme” or “start with this theme” button (this appears right next to the big blue demo button):
You can choose to activate the theme at this point (publishing it to your store by clicking the green button shown below) or alternatively you can make modifications.

Customise your theme.
Once you have chosen and published a theme, the next step is to make it your own.
Here’s how to do that.
Go back to your themes page in your control panel/command centre, and you should see that your chosen theme now appears.
Make sure that it appears next to where it says “current theme”.
To modify a theme, click the option to “Customize” (another big blue button on the right).

From here you can add and delete sections, upload and customise your own logos, type in the text you want, or add fonts and colour palettes if you have them.
Don’t forget to save your changes regularly when you are doing this!
Add your products.
Once your theme is in place, it’s time to stock your store!
If you are dropshipping, you might want to use a third party app like Oberlo to add products to your store.
Otherwise, here’s how to add a product.
To add a product, select “products” from the left menu on your dashboard, then select add product as shown below:

You will now see the following page:

Enter a title for your product and a detailed description. Your description is your chance to sell your product, so focus on benefits and stimulating desire rather than features.
The images section is where you can add images of your product. You can upload your own images or stock photos if you wish.
Once you have entered your description and uploaded your images, you can go to the form on the right hand side and fill out the details:

Creating collections makes it easier for customers to browse similar items.
Pay particular attention to the tags you are using as this is what will help customers to find your products.
Scroll down to “pricing”:

Simply enter the price you want to sell your product for.
You can ignore the compare at box as this does not show for customers and only relates to either items on sale or conversion optimisation strategies.
The next section is the Inventory section:

This is where you can enter the quantity for each product. You could also create custom SKU’s (stock keeping units) if you want to.
Further down you’ll see the shipping section:

If you have weight based shipping rates, you’ll need to fill this out, otherwise, you can ignore it and continue to the next section of the form.
Next up is this section:

Select add variant over on the right to input the details if you are selling multiple sizes, models or colours.
Once you have created your options, you can assign individual prices and quantities to each one as in the example below:

Finally, you will need to click the option right at the bottom of the page to edit your website SEO:

This is very important so don’t be tempted to skip this step!
All you need to do is enter the following information based on the individual product page:

Make sure your product name is in the title and that your description is enticing to customers and contains relevant keywords.
Here’s a guide to help you Optimise your Shopify Product pages.
Fully optimize your store by changing a few settings.
Naturally, you are going to want to make the most of your new Shopify store.
While it’s perfectly acceptable to stick with some of Shopify’s default settings, making a few changes and entering some details can help you to get off the ground more quickly.
This step involves making a few changes to your general, payment, checkout and shipping settings.
Don’t panic, we’ll take it one step at a time.
From the main control panel, start by selecting the settings option from the bottom left:

Remember this menu as this is your starting point for all the changes you’re going to make in this section!
What to change in your general settings.
You should now see the following menu. This is the main menu we will be using throughout this section.
Go ahead and click the very first option to access your general settings:

Here’s where you can update your store name and contact details.
Note that the account email is the email by which Shopify will contact you (when you make a sale or when anything important happens in your store) and this will not be shown to your customers.
Put the email address that you want your customers to contact you on in the “customer email field (you may want to create a support email address for this field):

You should also enter your legal business name further down this page and provide the address that you want on your invoices from Shopify.
If you want to open multiple stores it may be helpful for you to enter something in the “prefix” box.
Doing this makes it easier to distinguish between orders.
To give your store a unique prefix, stay on this page and scroll down further until you see the option to add a prefix:

All you need to do is pop in a few letters (or any type of prefix) that will allow you to distinguish between orders coming in from multiple sources.
As always, make sure you click save whenever you make changes!
What to change in your Payment Provider settings.
From the main settings menu, go ahead and select the second option down that says “payment providers”:

You will then see the following screen which allows you to complete your payments setup:

Please note that the option to accept Paypal Express Checkout is activated by default, so you will be able to accept payments via PayPal automatically.
Shopify Payments are powered by Stripe so you will need to hit the blue “Complete account setup” button to activate those.
Follow the prompts and fill out all of the necessary details on the “Shopify Payments” page, shown below:

You’ll need to provide some business and personal details as well as a brief description of your products or services and your bank details.
Once you’re done filling in all your details hit “complete account setup” at the bottom.
Paypal and Shopify payments should be enough to get you started.
If you want to add any other payments options in the future such as Amazon Pay or Apple Pay then you can do that at any time by going to settings then Payment Providers.
What to change in your Checkout settings.
Ok, once you have set up your payments, next you wanna head on back over to the main settings menu and select the 3rd option down which is “checkout”:

Ok. There are 3 simple things you need to do in the checkout section.
First, at the top of the checkout page you should see the customer accounts section.
By default, this will be set to the first option which is that accounts are disabled. This means that your customers can not create an account with you.
I recommend changing this setting to the second option “accounts are optional”.
This allows customers to create an account if they want to, but doesn’t make setting up an account mandatory in order to make a purchase.

Still on the checkout page, scroll down past the “customer contact” section (you don’t need to change anything here) until you get to the section called “form options”.
In the form options menu, change the setting from the default to “require first and last name”:

Next, scroll right down to the “Email marketing” section.
Here, you want to check the box that says “preselect the sign up option”, as shown below:

You may want to spend a bit of time looking at the rest of the settings on this page and selecting your own preferences based on the type of business you are running.
But you can rest assured that you now have your basics covered.
As always, don’t forget to hit that save button when you are optimising your stores settings.
What to change in your Shipping settings.
You know the drill by now. Head on back to the main settings page (or command central as I like to call it) and this time select “shipping”:

Now, how you fill out this section will depend on what you are selling and on whether you are dealing with inventory yourself or dropshipping via a third party.
Regardless of how you ship, it’s always a good idea to have an option for free shipping.
So you might do something like, spend $40 or more for free shipping, for instance.
This is good practice for maximising conversions.
There are options here for domestic and international shipping, so you’ll need to take a quick look at those and select your preferences.
The best option for those making their own items or physically shipping products is usually the “calculated rate” option.
If you choose to use USPS’S discounted rates for Shopify store owners, your shipping rates will be calculated for you automatically (providing that you have entered the correct weight and dimensions for each individual product on its product page).
The best option for dropshippers is probably going to be the “priced based rates” option, as this allows you to set your shipping prices according to order value, so the more the customer spends the better the shipping deal is for them.
Once you click “add rate” on the fixed price option you will be able to give each shipping price a name and enter a minimum and maximum order value.

Remember to remove the calculated rates option if you are dropshipping.
Let’s wrap this up.
Well done! If you have followed these steps, your store should now be up and running.
Good luck with your business and thank you for reading!