

Wanna know how to install and use one of the most powerful free internet marketing tools on the planet?
Of course, you do!
If you’re looking for a simple, straightforward guide that will help you get Google Analytics up and running in no time, read on.
I’m gonna walk you through 3 different ways that you can add Google Analytics to your WordPress website.
So, all you need to do is pick the method that appeals to you the most and then follow the steps.
Sound good?
Ready to get started?
Let’s dive in.
First things first: setting up Google Analytics.
Here’s how to set up Google Analytics. If you already have it, scroll on down to method 1.
First, go to analytics.google.com. Sign in to your Google account when prompted.
You’ll then see this:
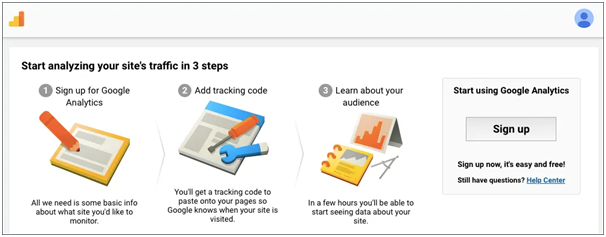
Click the sign-up button.
Enter an account name: Your account name can be anything you like. You can house multiple websites (up to 50) under 1 account.

Then scroll down and click next.
On the next screen, you’ll see 3 options, for what you want to measure:
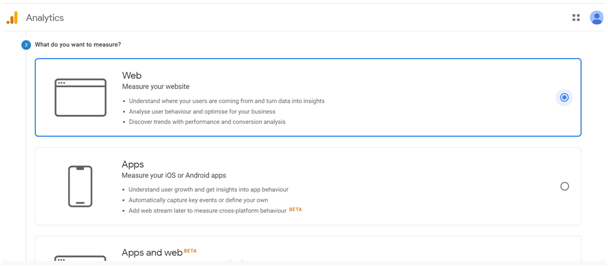
Make your selection then scroll down and click next.
The final step is to enter your property details. This is where you put your website name and URL:

You also need to select an industry category from the drop-down. Just select “other” if you can’t find a match.
Hit create (blue button at the bottom) then accept the terms of service on the pop up:
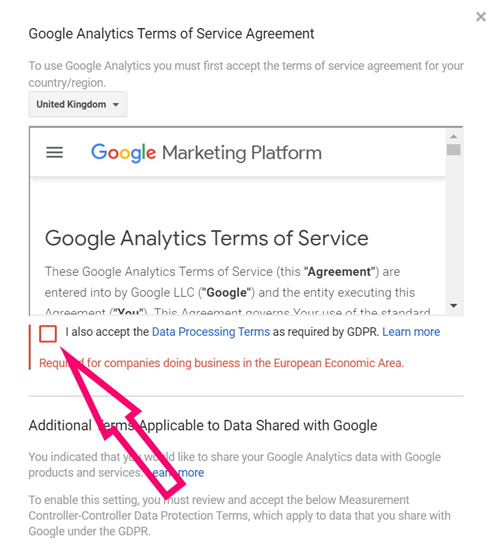
Scroll down, check the box and click “I accept” at the bottom of this pop-up and you’re done!
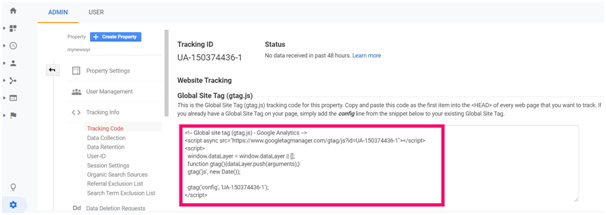
If you’ve set it up successfully, you should see a page like this which shows your tracking id and JavaScript code:

Congratulations! You’re now ready to install Google Analytics on WordPress.
Method 1. How to add Google analytics to your WordPress site using the Monsterinsights plugin.
If you’re not the most technical person in the world then this is the option for you.
Installing the Monsterinsights plugin is the quickest and easiest way to get your hands on some juicy website data:

Using a third-party plugin like Monsterinsights means that you don’t need to start tinkering with code, so there’s no need to worry about accidentally messing up your website – phew!
Here are the core features of the plugin:
- Google Analytics dashboard.
- Universal tracking.
- Realtime stats.
- Enhanced e-commerce tracking.
- Page-level analytics.
- Affiliate link and ads tracking.
- E.U. compliance (GDPR friendly)
- 1 click custom tracking options.
- Access to Google Optimise.
Of course, the specific features you have access to will depend on which plan you go for.
You can either get a 14-day free trial on any of the paid plans they offer or you can use the free version.
Whether you choose to pay or not, follow the steps below to get Google analytics using the Monsterinsights plugin.
10 Steps to follow if you want the paid version…
If you don’t want to pay for Monsterinsights, skip this section and scroll down to 10Steps to follow if you want the free version below.
1. If you’re signing up for a plan, go ahead and do that on the Monsterinsights website and download the plugin from there.
2. Then go to WordPress and select Insights and settings from your main dashboard.
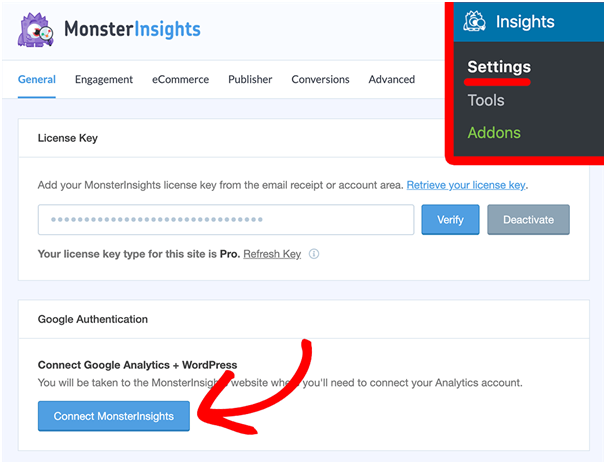
3. Hit the blue button that says “Connect Monsterinsights”.
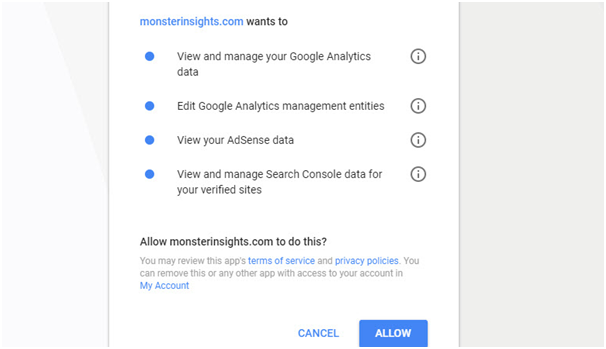
4. Next, you need to tell Google that you are happy to share Google Analytics data with Monsterinsights.
5. To do that, go to Gmail and select the account you want to use:

6. Once you have done that, you should see the following screen where you have the option to allow:
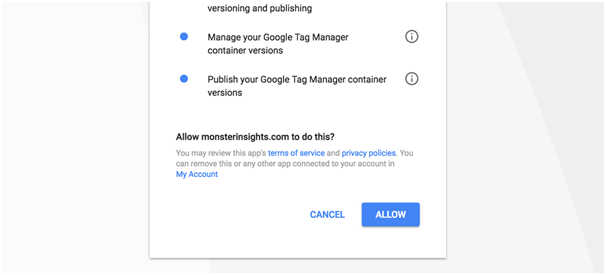
7. Go ahead and click Allow.
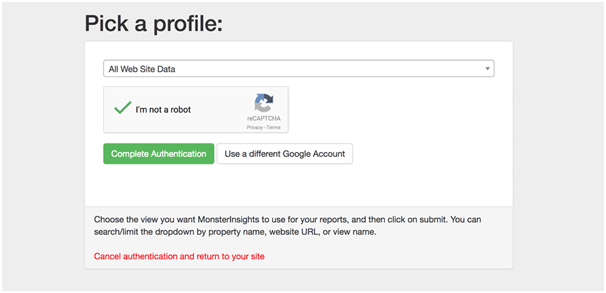
8. Pick a website profile to connect to Monsterinsights as shown below:

9. At this point, you’ll probably see an “I’m not a robot” option, so go ahead and check that.
10. Then hit the green “Complete Authentication” button and you’re all set!
10 Steps to follow if you want the free version…
1. If you want the free version, head on over to your WordPress dashboard and hit Plugins from the main menu on the left then Add New:
2. Type Monsterinsights (all one word) into the search bar on the top right and you’ll see a cute little purple monster:
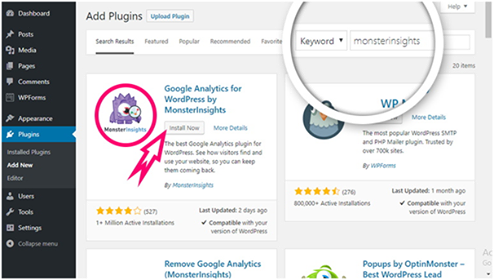
3. Click the Install Now button next to this adorable little guy then hit Activate when prompted.
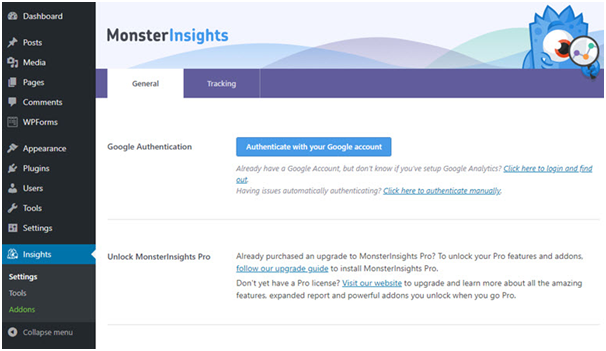
4. Next, go to Insights from your main WordPress dashboard menu and select Settings.
5. You’ll need to authenticate Monsterinsights using your Google account, so go ahead and hit the big blue button that says “Authenticate with your Google account” as shown below:
You should now see the following screen:
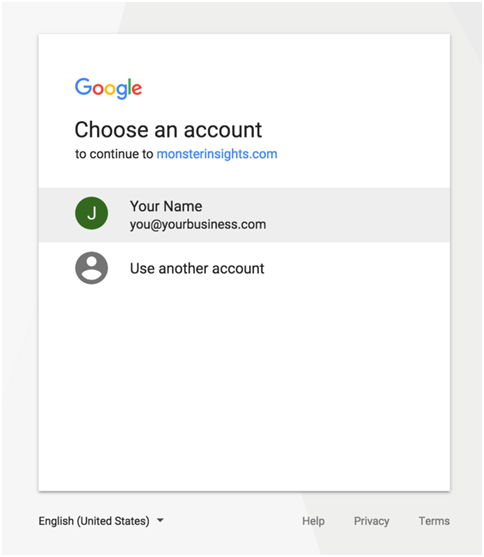
6. Choose the account you want to proceed with and you’ll be taken to the next screen where you can allow Monsterinsights access to your Google Analytics data:
7. Click the blue button to allow Google Analytics to share data with Monsterinsights.
8. Choose the profile you want to connect (don’t forget to tell them you’re not a robot):
9. Click the green “Complete Authentication” button.
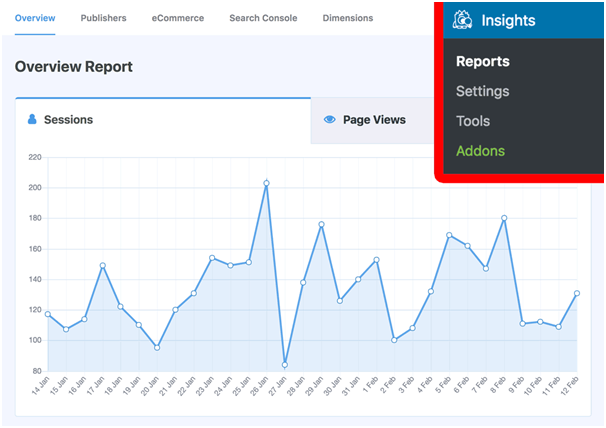
10. To access your data, go to insights and reports:
Method 2 – How to add Google Analytics code to your WordPress site using the Insert header & footer plugin.
This method is pretty straightforward and shouldn’t take too long. Here’s what you need to do:
1. From the main WordPress Dashboard, first Go to Plugins then select add new.
2. Type “Insert headers and footers” into the search bar, then click install now when you see the plugin shown below:

3. Once you have installed the Insert Headers and Footers plugin, you’ll need to hit activate:
4. Next head on over to settings then select Insert headers and footers as shown below:

As you can see, there is code in the header box above, but your header box should be empty.
The next step is to Insert your JavaScript from Google Analytics. This is the tracking information you received when you created your Google Analytics account.
Here’s what it looks like:
5. Copy and paste the Google Analytics code into the header section (the empty header box).
6. Don’t forget to click the blue save button!
7. Now do your happy dance!
Method 3 – How to add Google Analytics code manually to your WordPress theme.
This final method isn’t for the fainthearted or the forgetful.
If your coding skills are a work in progress, you might wanna skip this one.
However, if you’re an advanced user and you’re not afraid of tinkering with code, then, by all means, go ahead and use this method.
But be aware that you will lose your code if you change themes, so remember to transport the code first when the time comes to do a theme update.
Here’s what you need to do:
1. Go to appearance then theme editor.
2. You’ll see a warning about the dangers of messing around with code. Click I understand to continue.
3. Select functions.php from the right-hand menu:

4. Add the following code to your themes’ functions PHP file:

5. Copy and paste your Google Analytics code into step 4 as shown above.
You should now have successfully added Google Analytics to your site. Well done!
Final thoughts:
So, there you have it folks, 3 simple and straightforward ways to get Google Analytics up and running on your WordPress site.
Once you have followed the steps for your chosen method and successfully completed the install, you will see that the juicy data will soon start to roll in.
You can view all of the data for your site from your Google Analytics homepage, and if you chose to go with Monsterinsights, you’ll get nicely organised reports to help you keep track of and improve your stats.
I hope that you have found this tutorial useful and I wish you the best of luck with your business.
Happy analysing!