
Ready to optimise your ad campaigns and take your conversion stats to the next level?
Adding the Facebook pixel to your WordPress site is a complete gamechanger.
Here’s how to get your hands on the best marketing tool of 2019 in 10 minutes or less.
Eager to get started? Let’s jump in.
Why do I need a Facebook Pixel?
Facebook pixel is a useful marketing tool that can help you take your business to the next level.
It has been carefully designed to increase the effectiveness of Facebook ad campaigns.
Facebook Pixel will make it easy for you to boost your conversion rates.
It does this by monitoring and tracking your success rates, providing crucial data that can be used to duplicate the conditions that create success.
So in other words, you will be able to see what works, with who and when allowing you to make more informed choices and hone right in on the people who are most likely to take action after seeing your ad.
The Facebook Pixel could even help you to cut down on your advertising spend.
How to create a Facebook pixel.
Before you can install your Facebook pixel, you’ll need to create one. We’ll show you how to do that in this section.
If you have created your Facebook pixel already, then feel free to skip this section.
Creating your Facebook pixel is quick and easy. Just head on over to Facebook ads manager and select the “pixels” tab:

If you haven’t already created a pixel (you can only have 1 per account) then you should be prompted to create one. Simply follow the prompts to create the pixel:
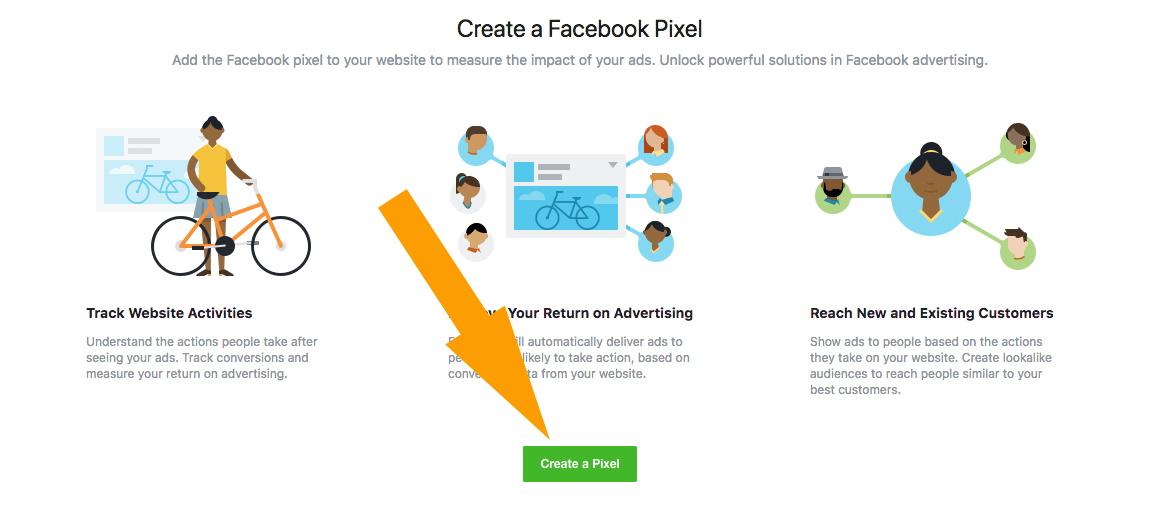
You’ll be asked to enter a name for your pixel. Then just click create and you’re all done!
Once you have created your facebook pixel, you’re now ready to install it on WordPress.
There are 2 ways to install the Facebook pixel on a WordPress site.
Manually (by generating, copying and inserting a piece of code) or by using a free plugin.
The method you’ll choose depends on what features of the FB pixel you most want to take advantage of.
The manual option is the easiest and quickest way to get the FB pixel.
Most people tend to opt for the manual method as that allows you to access the basic features (which are pretty awesome).
But, if you use the plugin method, you’ll be able to use your WordPress dashboard to create custom audiences and conversion goals.
The manual method:
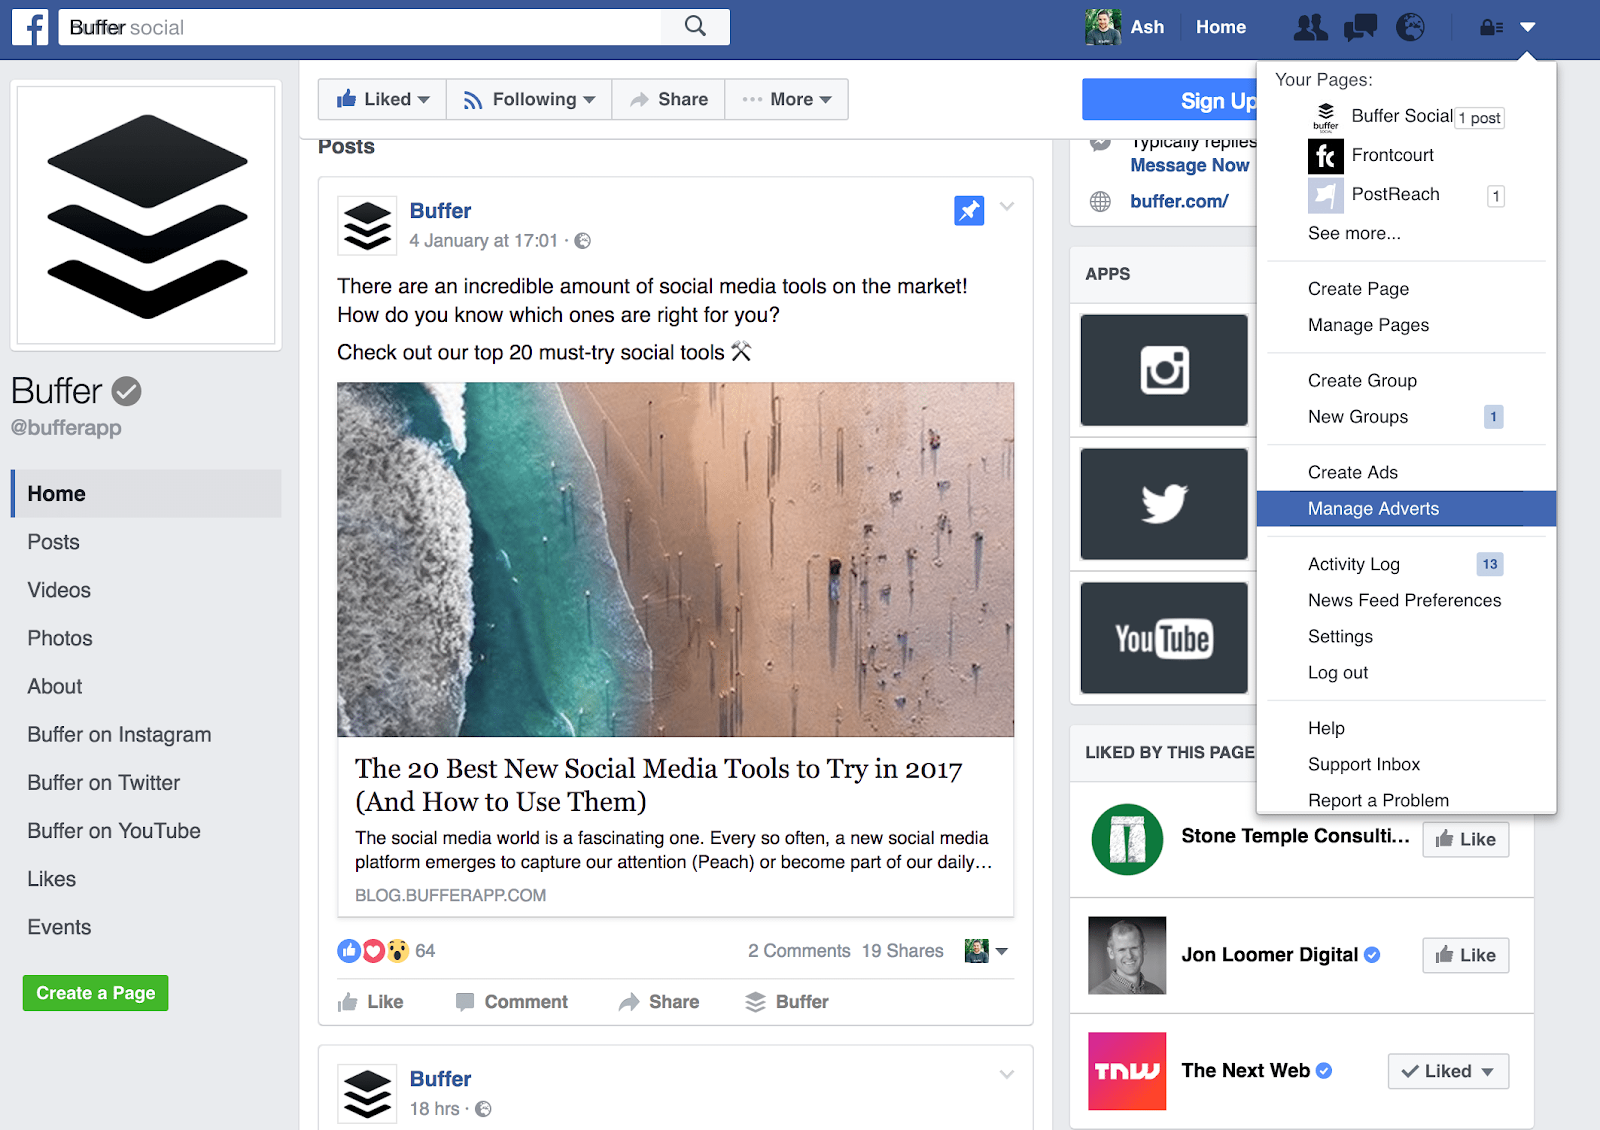
- Login to Facebook.
- Use the arrow on the top right of the screen to access the menu and select the “manage adverts” option as in the image below:
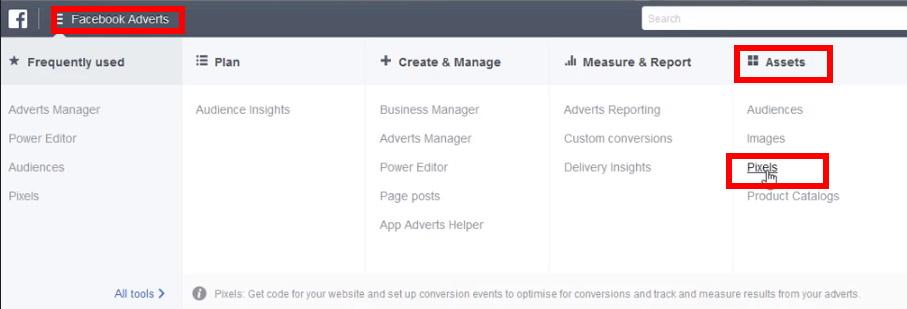
3. Go to “facebook adverts” on the top left. Look for where it says “assets” on the far right and click “pixels” (it’s the 3rd one down):
Give it a few seconds to load and you should see this screen:
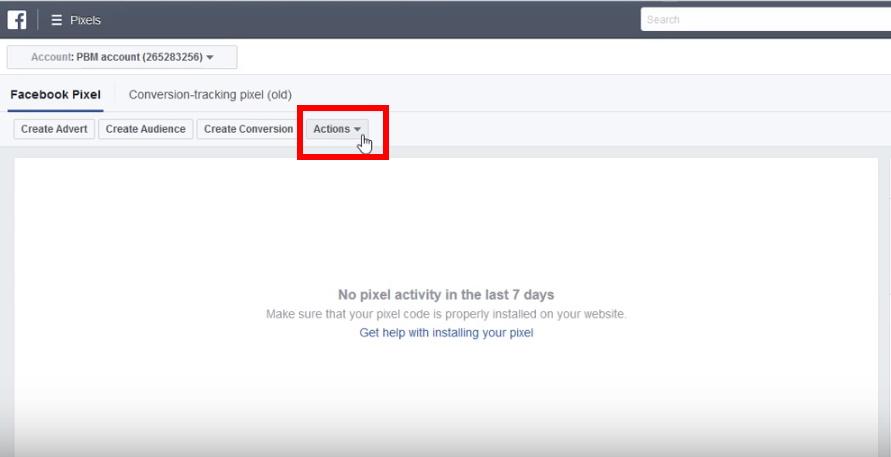
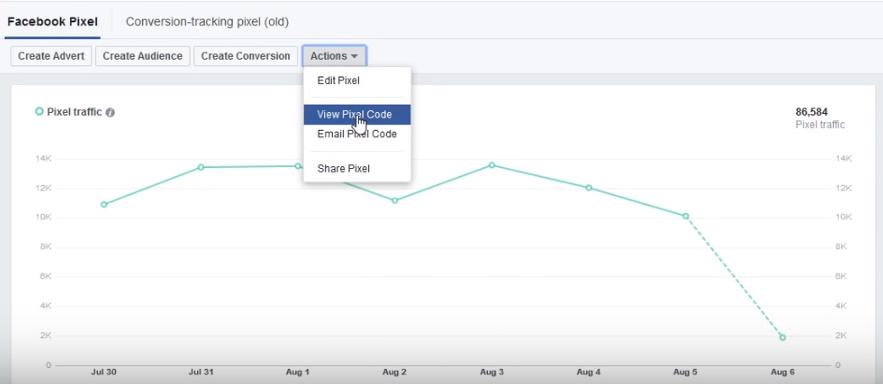
Go ahead and select the actions drop-down menu as in the above image.
4. Select “view pixel code” as in the image below, this will then display the code for you to copy.
Simply copy the code when it appears by right-clicking in the way you normally would.
The code should look something like this:

Well done, you have finished with FB for now. Go ahead and visit your WordPress dashboard.
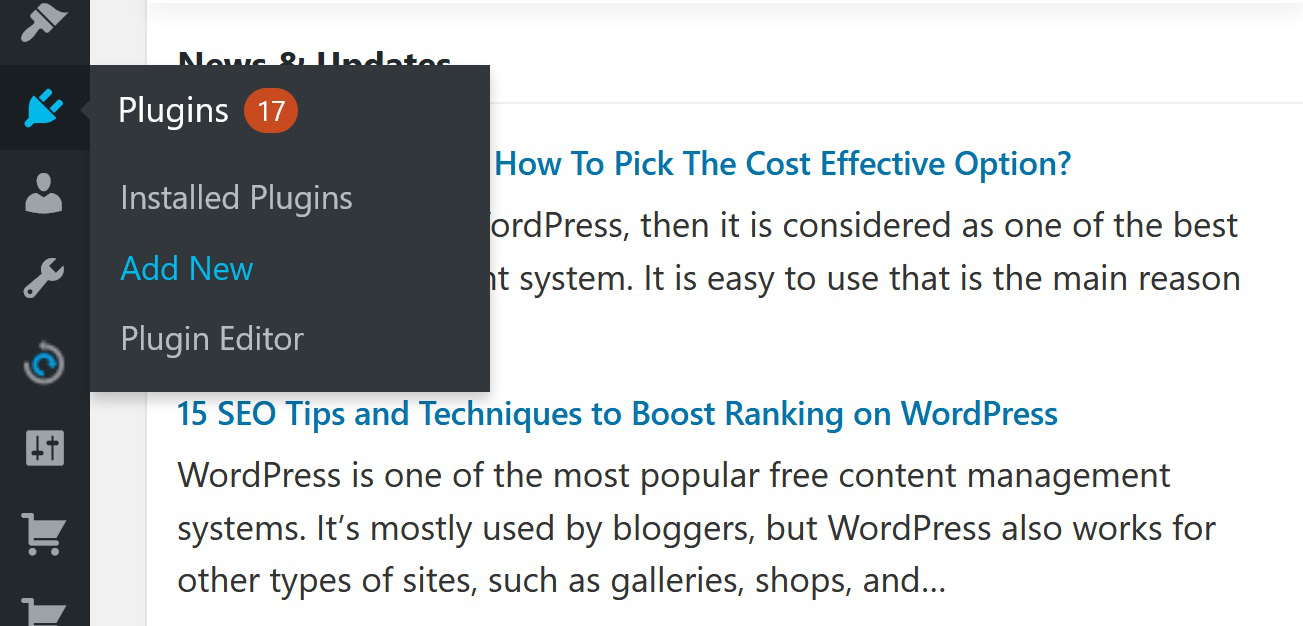
5. Go to the plugins option on the left-hand side menu, and select “Add new”.
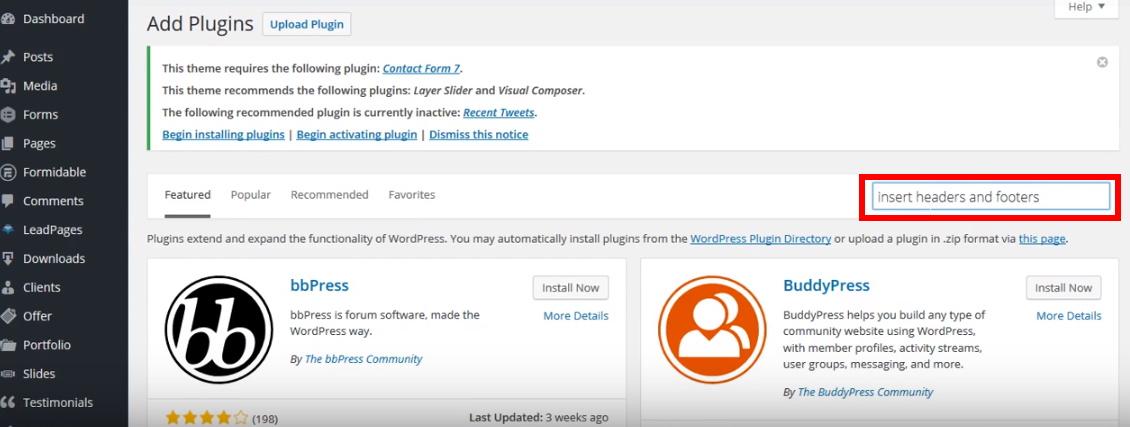
6. Now type “insert headers and footers” into the search bar on the right:
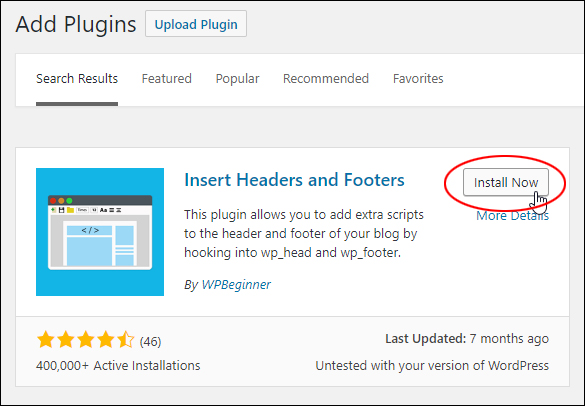
7. You’ll want to install the first plugin that comes up, it’s by wpbeginner and it has over 400,000 active installs:
Once you have successfully installed “Insert headers and footers”, it’s time to paste in your code.
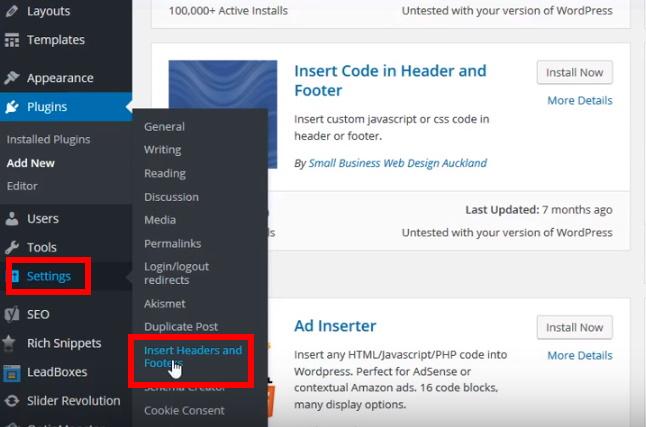
8. Scroll down the WordPress dashboard menu on the left until you find “settings”. Click or hover over settings until a second menu appears just to the right. Then select “Insert headers and footers” as in the image below:
If you have followed the steps correctly so far, you will now see this screen. The box at the top is where you are going to paste in your pixel code:
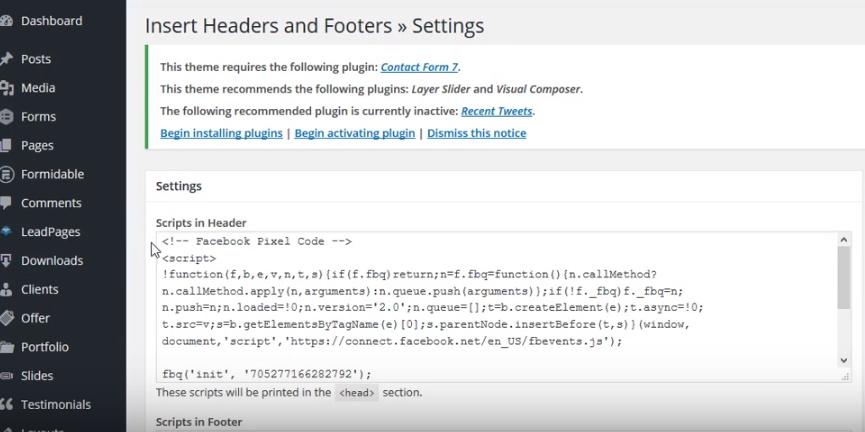
9. Right-click and paste in the usual manner, but don’t forget to scroll down and hit the save button at the bottom of this page.
And that’s it, you have now successfully added your Facebook pixel to your WordPress site!
10. To check that it is all working as it should be, you can install a handy Google Chrome plugin called the “facebook pixel helper”.
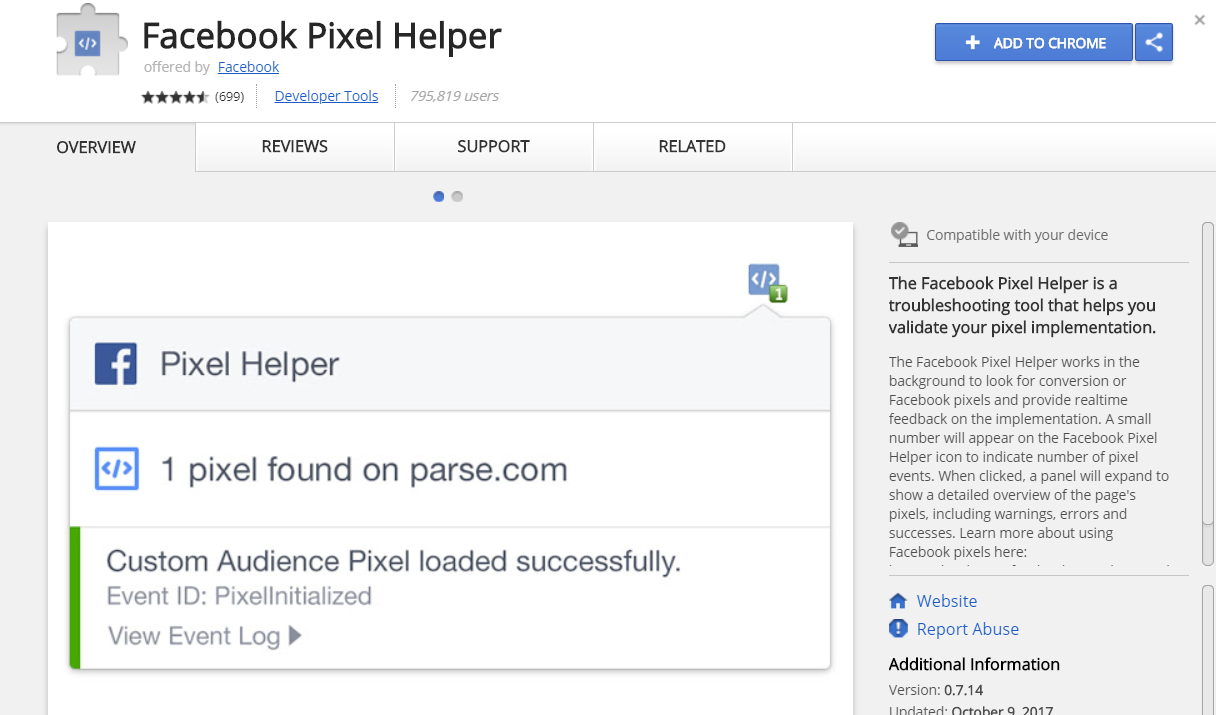
Once installed, this troubleshooting tool will tell you whether your pixel has loaded successfully.
The plugin method:
If you want to take advantage of advanced features like the ability to create and track custom audiences and make killer Woocommerce ads, you’ll need a plugin.
1. Pixel Caffeine is the go-to plugin for Facebook Pixel. So the first thing you’re going to want to do is to install and activate it:

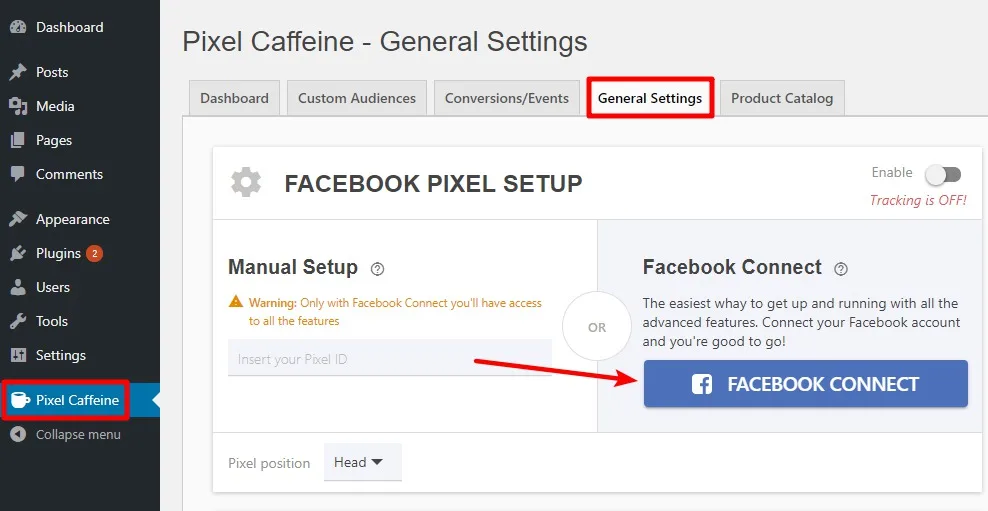
2. In your WordPress dashboard, you should see a new menu item named “Pixel Caffeine” (it’s underneath “settings” on the left).
Go to the general settings tab and hit that giant blue Facebook Connect button:
3. You should then be presented with the following authorization request:

Go ahead and click ok.
4. At this point, you will be whisked away back to your WordPress dashboard. This is where you can select your Ad account and pixel ID:
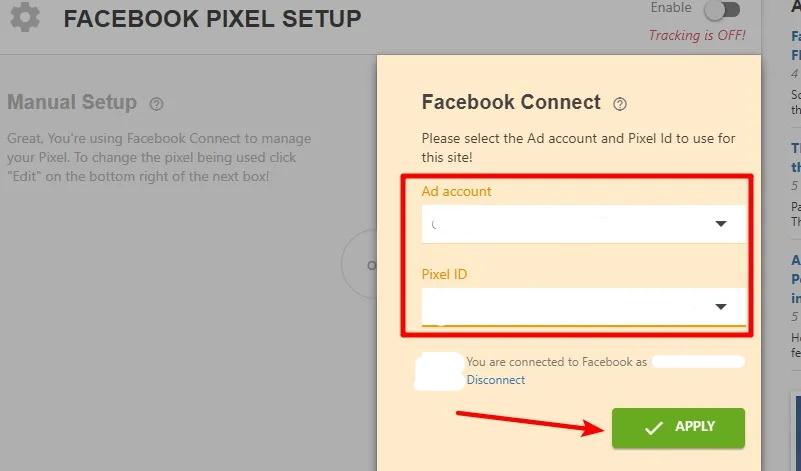
Click the green apply button on the bottom right and you’re all done!.
Now that you have completed the set-up, you might want to scroll down and take a look at the “custom audiences” and “conversion” options:
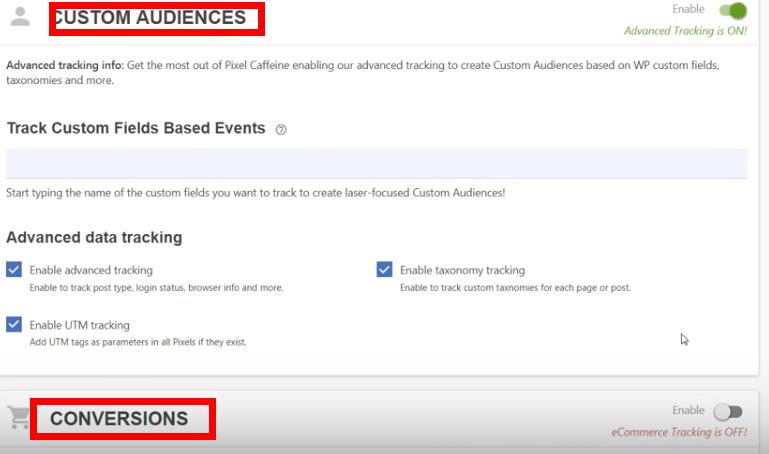
You’ll see that there are multiple advanced data tracking options, as well as conversion options for those using Woocommerce.
Scroll down this page even further and you’ll see a whole host of tracking and developers tools that you can enable.
Don’t forget to save once you have chosen your preferred settings!
That’s it. Your Facebook pixel should now be up and running.